Overview
Creating an IBM Satellite Location is actually pretty simple. We simply need to give it a name and specify the IBM Cloud Multi-Zone Region from which the satellite location will be managed. We also need to generate and download a script that will be run on each host to attach it to the satellite location.
Create Location
-
Click on the
 icon then click on
 Satellite. Click on theCreate a Satellite locationbutton. -
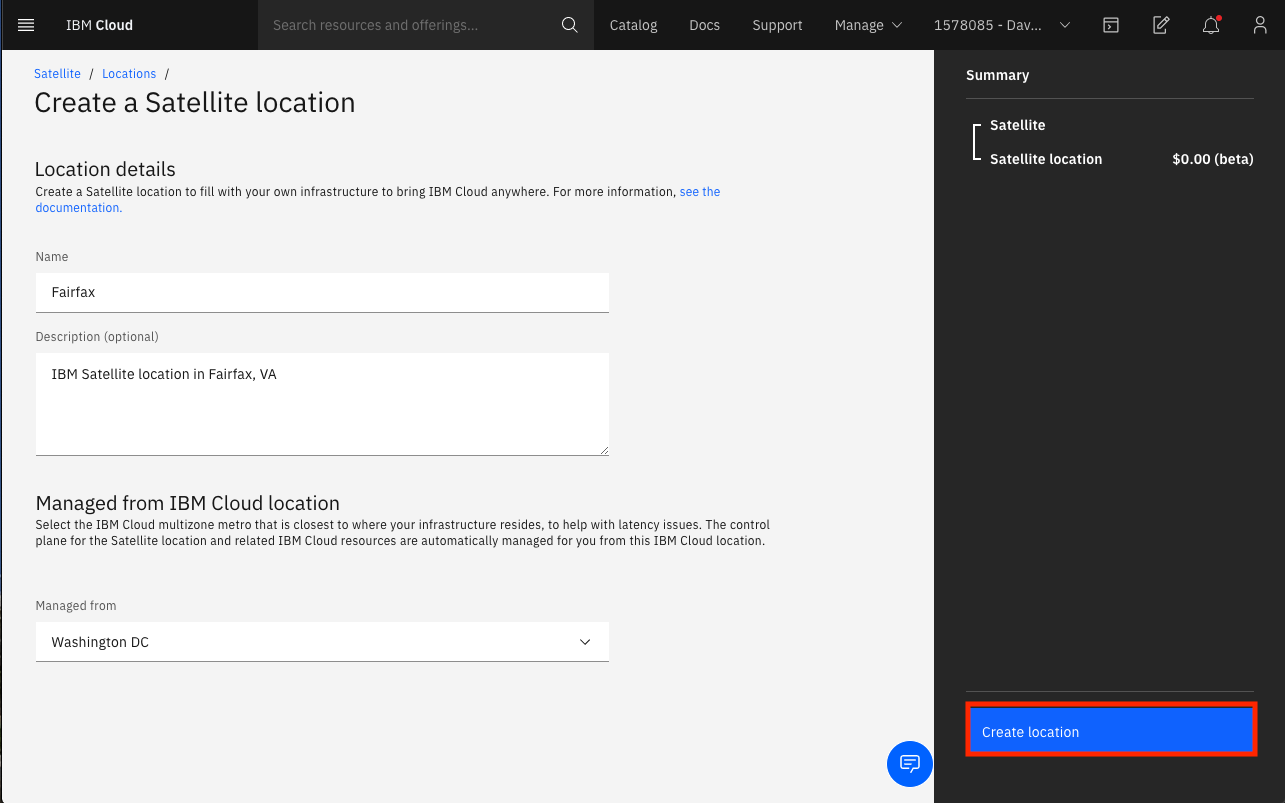
Fill out the name and (optional) description for your location. Click on the
Managed fromdropdown and selectWashington DC.Info
IBM Satellite locations can have hosts wherever you need them, but your location is still managed from a Multi-Zone Region (MZR) in IBM Cloud. There will be management traffic between hosts in your location and the MZR, so be sure to select the MZR that is closest to your location.
-
Click the
Create Locationbutton to create your location. You will be taken to theGetting Startedpage for your location. It is a helpful wizard that explains what you need to do next to finish setting up your location. We will be doing some of this in the next steps, but we do need to generate a script that we will need later. Click onNext.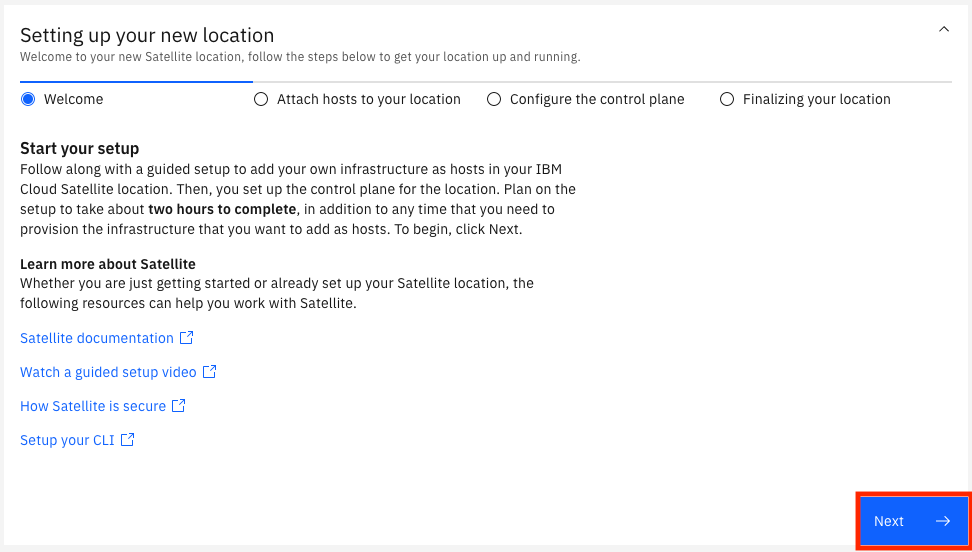
-
Click on the
Generate scriptbutton.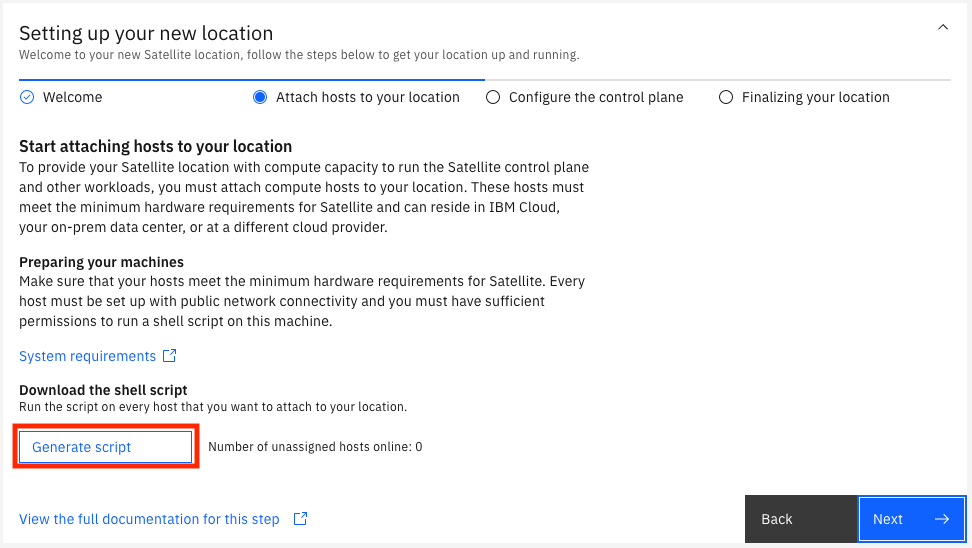
-
Add some tags if you wish, then click the
Download scriptbutton.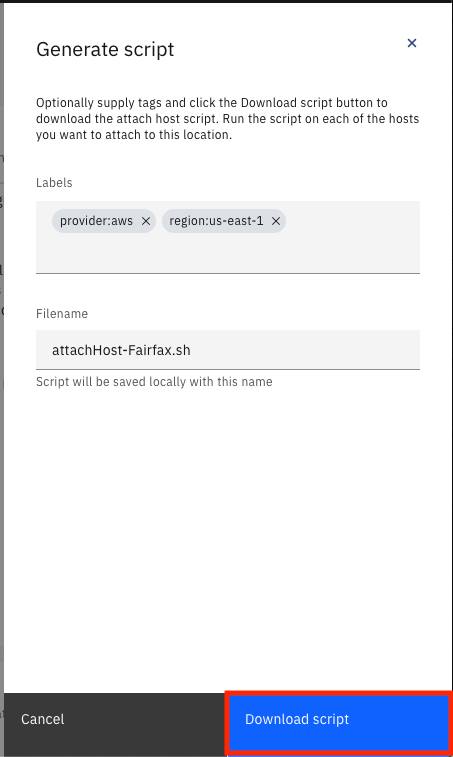
-
We will come back and finish the configuration later. For now, click the
Overviewlink on the left navigation menu to see a summary of your location.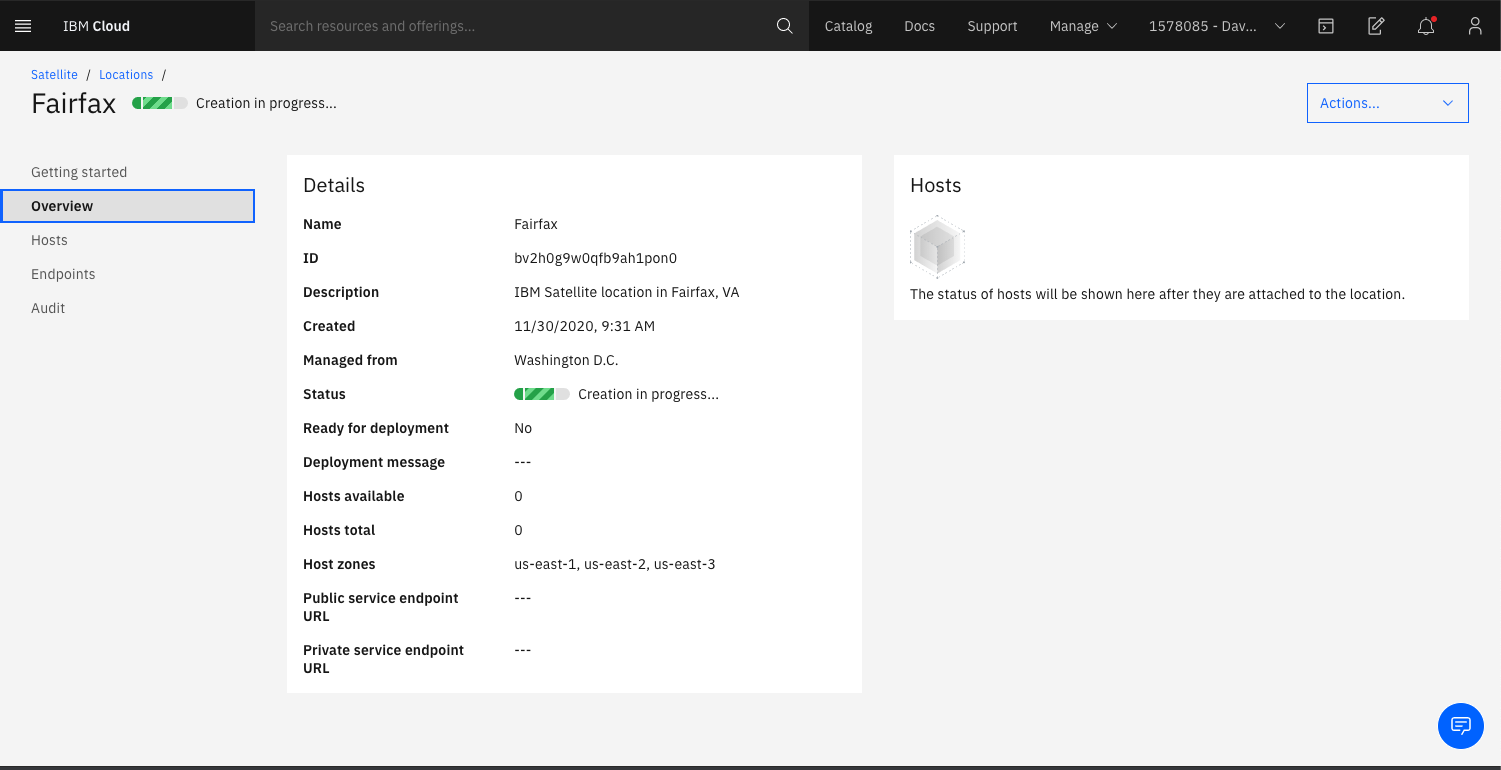
Note
The status field for your location may be slighly different than the one in the screen shot above.
Tip
Many of the components you will create in AWS allow tags, so take note of the name and ID of your location. It is helpful to add
sat-location-nameandsat-location-idtags to your AWS resources using these values so that you can later link them back to which location they are attached.
Update registration script
In order to attach hosts to your satellite location you have to run the script you downloaded in the previous section. In many cases you will need to do this manually, but with AWS you can provide a cloud-init script that will run when the EC2 instance gets created. We will use this feature, but first we need to edit the script; we also need to run some operating system updates, as documented step 2 here, and we can add these commands to the script.
-
Open the script you downloaded in the text editor of your choice. Add the following lines to the script after the line that sets the
API_URLenvironment variable.# Enable AWS RHEL package updates yum update -y yum-config-manager --enable '*' yum repolist all yum install container-selinux -y echo "repos enabled"Your script should look like this:
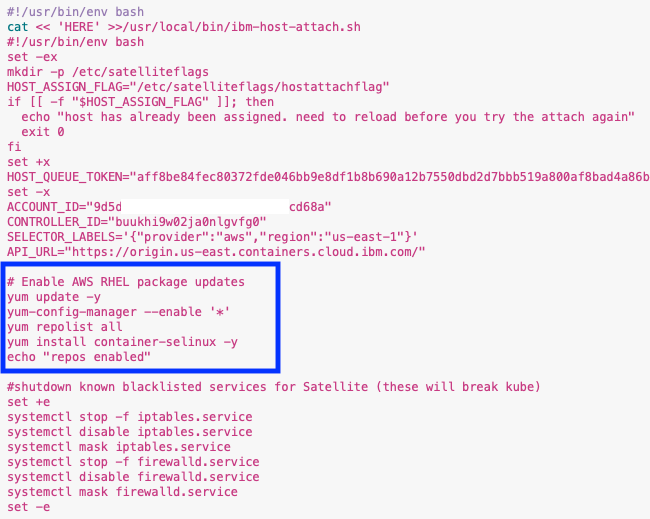
-
Save the script; we will use it later when we create the hosts.
That's it for now. Next it is time to create all of the prerequisite resources in AWS.
(Alternative Path) Creating AWS resources with terraform
If you know how to use terraform there is a folder in this repo that contains terraform scripts for creating all of the AWS resources, including the EC2 instances. Before you run the terraform you need to create your location and generate/download the registration script.
Note
This terraform will create 3 EC2 instance for the control plane and 3 instances for use as worker nodes for an OpenShift cluster. If you don't want to create the worker node hosts right away you can comment them out in main.tf.
To use Terraform to create your AWS resources:
- Create your location and download the registration script.
- Copy and paste the contents of the registration script into the
userdata.shscript in the terraform folder. - Update the
userdata.shscript by following the step 2 of the instructions here. You only need to do step 2. - Update the
provider.tffile with the appropriate AWS region you want to use. - Update the
variables.tffile as appropriate:- Set the
satellite-location-nameto a value that does not include any spaces. This does not have to match your location name in IBM Cloud, it's just a value to be used when naming resources. - Set the availability zones as appropriate for the region you chose.
- Specify the name of the SSH key you created in AWS.
- Specify the AMI to use. The name of the one I used is
RHEL-7.9_HVM_GA-20200917-x86_64-0-Hourly2-GP2. In my account the AMI id isami-0d2bf41df19c4aac7but I am not sure that is the same ID in every account. - set the
control-plane-instance-typeas appropriate. The typet3.xlargedoes work. - set the `worker-plane-instance type as appropriate. It can be the same as the control plane.
- Set the
- Make sure you have the AWS CLI installed and a configuration profile set so that it knows what credentials to use. More information about authentication with the AWS terraform provider can be found here. If you don't want to install the AWS CLI you might be able to use environment variables to set your access key and secret key.
- Run
terraform initto initialize the AWS terraform provider. Runterraform planto see what the script will do, then runterraform applyto create the resources.