Create hosts
We should create 3 hosts for the Satellite control plane. If possible they should be in three different availability zones. They do NOT need to be in an MZR, but they will be managed from one, so they should be located geographically as close as possible to the MZR you will choose. In the Beta, only US East (Washington DC) is available in North America, and London in Europe.
To create a host:
-
Log into the IBM Cloud Portal click the
 icon and choose
 Classic Infrastructure. You will probably land on theDevicespage, but if you don't click onDeviceson the left navigation menu and then clickOrder.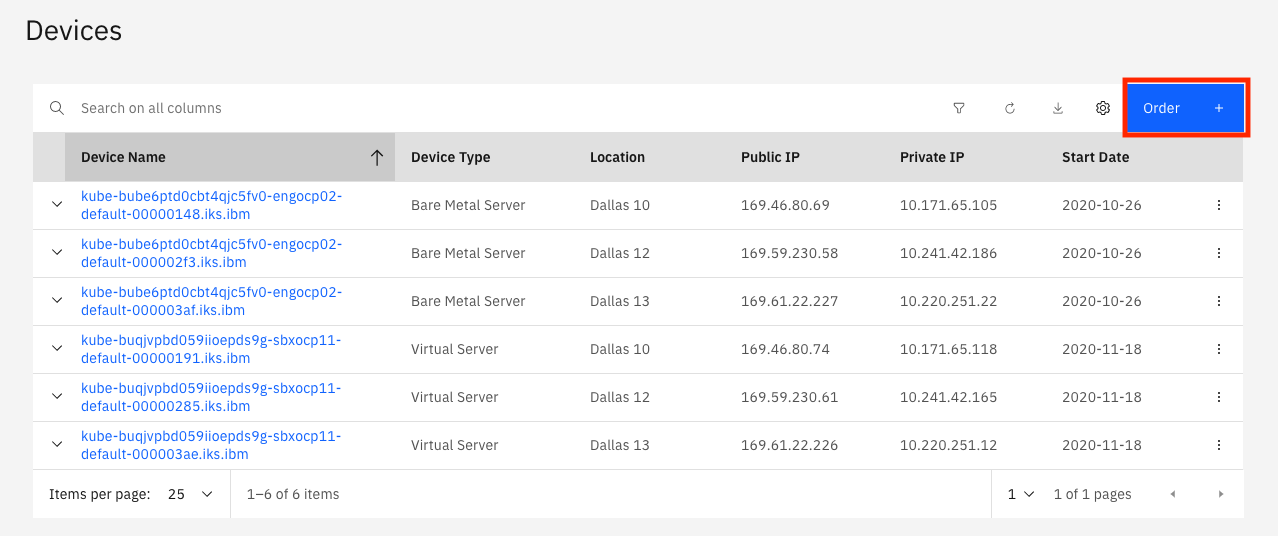
-
Click on the
Virtual Server for Classictile.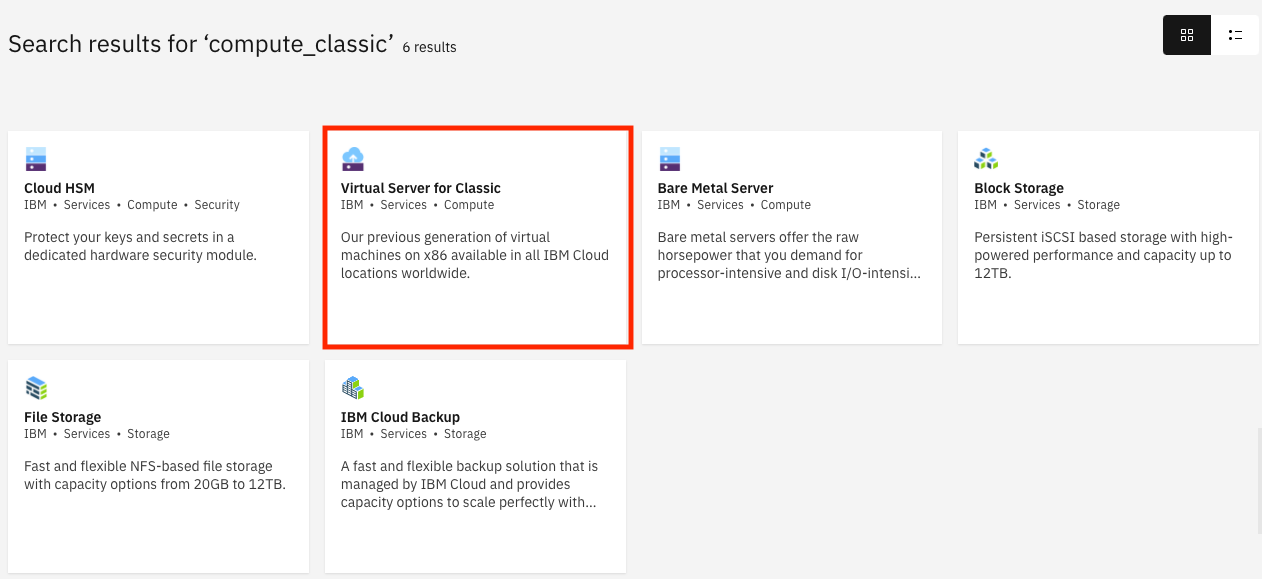
-
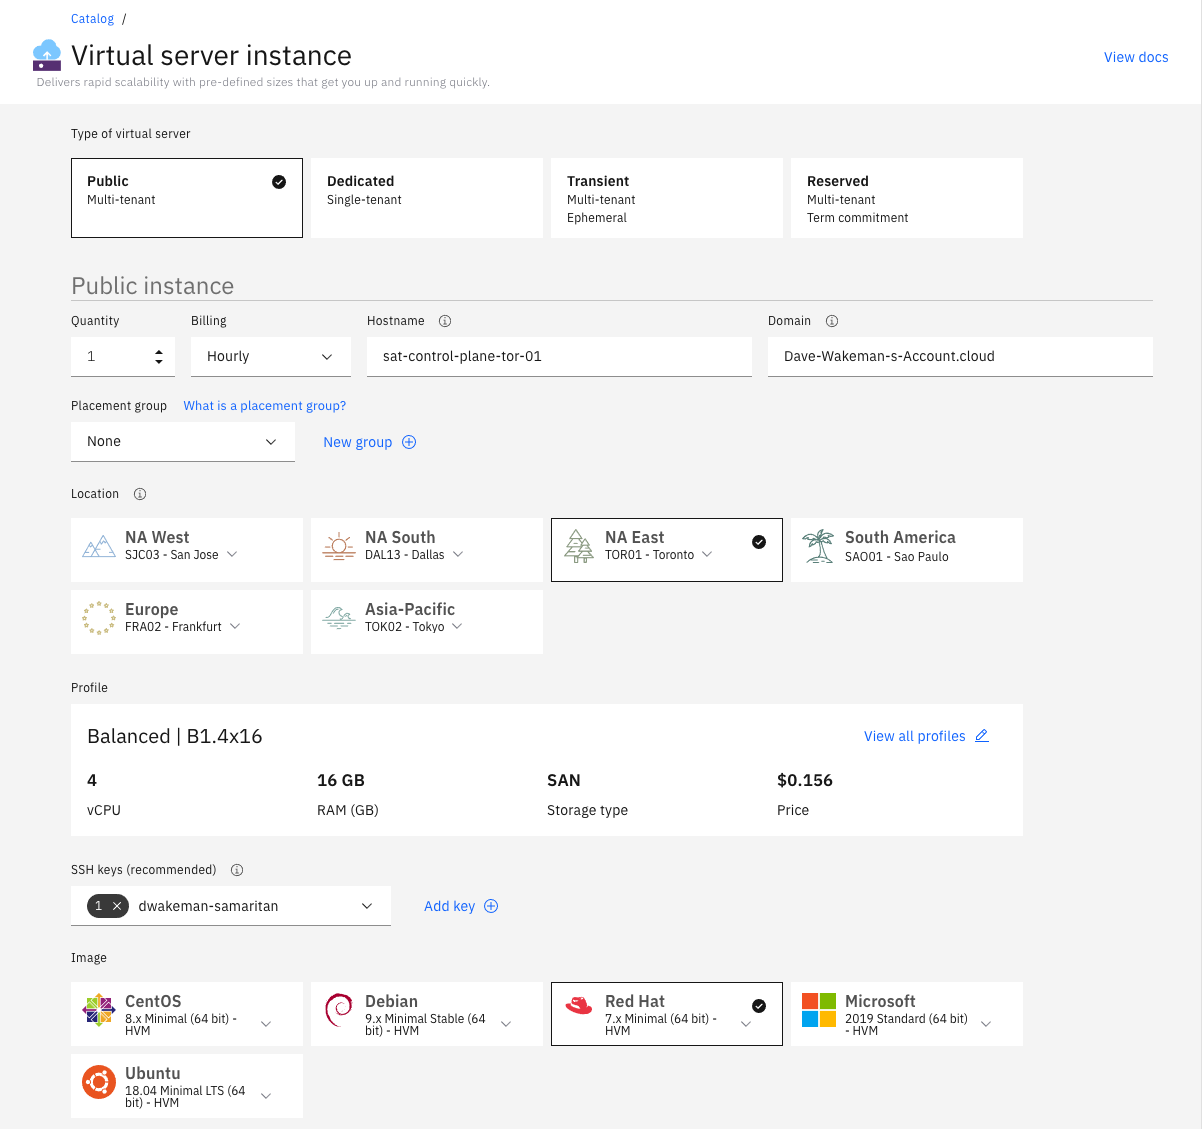
On the next screen, fill in the details for your virtual server. This example assumes that a satellite location in Toronto is being created. At a minimum, make these selections:
- Specify a unique hostname.
- For location, select the
NA Easttile andTOR01 - Torontoin the dropdown. - In the profile section, click the
View all profileslink and chooseB1.4x16. ClickSave profile. - Select your SSH key (the one you created earlier) in the
SSH keysfield. - In the
Imagefield select theRed Hattile and choose7.x Minimal (64-bit) - HVM. - In
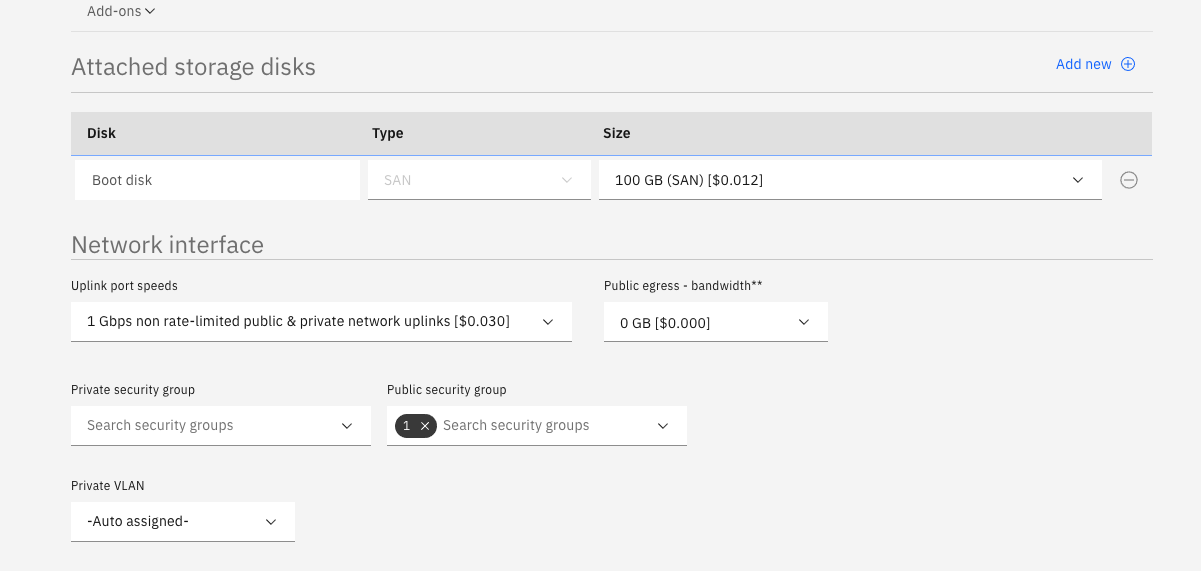
Attached storage diskschange the size of the boot disk to 100 GB. - (Optional) In the
Network interfacefield click theUplink port speedsdropdown and choose1 Gbps non rate-limited public & private network uplinks. - Click the
Public Security Groupdropdown and pick theibm_satellitesecurity group you created earlier. When done the order page will look like this:
- Click the checkbox agreeing to the third party service agreements and click
Create.
Repeat the steps above to create two more virtual servers to be used for your location's control plane. Make sure they have unique host names and choose different locations: TOR04 and TOR05. This will ensure that these three servers are in different data centers for resiliency purposes.